Showing posts with label buttons. Show all posts

Friday, 9 August 2013

Upcycled Ottoman


About a year ago, neighbours of ours over the road were getting rid of the table and mirror below:


I played it fairly safe with the rejuvination of the table, and just went for a neutral white paint look (for the full details click here):


However, as Jim fully knows, and I am beginning to accept a) I am messy and clumsy and nothing in the flat stays plain white for long, and b) I am a crafting project addict and nothing in the flat stays plain white for long!

In the meantime I also became addicted to Pinterest and saw several inspiring pins about how simple and easy it can be to transform a dull, basic coffee table into a lovely, comfortable and interesting ottoman.

I began by measuring the table for the amount of foam I would need to sit neatly on top:


I found a great seller on ebay who provides different thicknesses of foam in the exact dimensions you require. I went for three inches thick, and used a spray mount glue to fix it to the table top:


I then took a trip to the lovely Fabrics Galore on Wandsworth Road and got myself some cheapety-cheap wadding. I went for at least double the area than of the foam so that it would comfortably wrap around the edges and underneath the table:


Using a nifty staple gun (how I lived without one before now I'll never know) I pulled the wadding gently around the foam and stapled it to the underside of the table:


Next came the material. I picked this grey and white striped number up quite cheaply at an antiques stall in East Dulwich thinking I would use it for some cushion covers. But, to be frank, we already have too many cushions, and it was the perfect size for the ottoman - it found its calling! Pulling the material taught, but not too tightly so that the foam and wadding were squashed down, I evenly worked my way from the centre of each side, stapling the material to the underside of the table:


When it came to the corners I found it easier to neatly pin the fabric in place first making sure the folds were crisp, before stapling.


The final detail were some buttons I found on ebay that allow you to cover them in any fabric...


...which I sewed evenly onto the top of the ottoman, using a long needle so that they attached onto the foam to give it a dimpled effect:


Et voila! A super-easy ottoman from a sad, abandoned table!


Thursday, 18 April 2013

Candle decorations

This is a simple little project that can be done while watching telly or even travelling on the bus. All you need is a selection of buttons and beads, some strong by easily malleable craft wire and a candle to jazz up. One thing to remember: Make sure your piece of wire(s) is twice as long as the circumference of the candle as it loses length when you thread the buttons on.

Et voila:


You can decorate anything in this way, from candles, jars,and vases to chair legs, and even human legs.


Wednesday, 6 March 2013

Spring has sprung fabric noticeboard


After yesterday's delightful weather (highs of 16 degrees C on 5th March!) I thought it was time to post this blog on how to make a fabric covered noticeboard, after I recently made this floral and blue-ribboned one for Jim's sister's 18th birthday. It would also make a great Mothers' Day present :)


Take one old/new/borrowed (I don't know if you can get blue ones) cork pinboard and some wadding, and cut the wadding so that it is 3 inches bigger than the board all the way round.


I laid the board face down on the wadding and folded the edges round onto the back of the board. I also removed the tiny hooks and pins and kept them safe to re-attach later on.


I cut all four corners off the rectangle of wadding, so that it would fold better and sit more neatly on the back of the board.


Initially I tried using a staple-gun to affix the wadding, but the staples fell out. My very good friend and craft advisor Stephanie Lewis recommended using double sided carpet tape to stick it on. Carpet tape is truly the stickiest and best "attatcher" I have ever come across.


I then cut the fabric I wanted to use to size, again, about 3 inches larger all round than the board. Next I placed the wadding-covered board face down on the underside of the fabric and used the corner-cutting and carpet tape method as above to attach the fabic, making sure it was pulled quite tight.


Next I cut the ribbon to the different lengths required in order to make a nice diagonal criss-criss pattern and pinned them in place. I used a glue gun to stick down each ribbon end to the reverse of the board, again, ensuring that the ribbons were quite taught.


With the back of the board looking a bit scruffy what with the layers of wadding, carpet tape, fabric, ribbon and glue, I took an extra large bit of cardboard, trimmed it down to size and glue-gunned it onto the back to hide the mess.


Using a hammer I gently re-attached the hooks to the back of the board, ensuring the pattern on the fabric would be hanging the right way up.


Last but not least, I sewed some pearly buttons onto each ribbon crossover, also sewing through the fabric to make the ribbons a bit sturdier to hang things on.


This is an example of another board that my beautfiul mum made me a few years ago.


It's where I keep all the pretty cards and notelets that come through the post :)


Wednesday, 23 November 2011

Shrunken cardigan part 1: cosy cushon cover

It has taken me a good few months to realise that no matter what setting you put our washing machine on, and no matter what temperature, it will do something completely different once the clothes are in it and spinning around - it has a mind of it's own. So, although immediately disgruntled, I soon got over the fact that a few weeks ago, one of my favourite woollen cardigans came out of the washing machine 10 times smaller than when it went in, and barely big enough for a barbie. It was bound to happen one day.

But, as they say, every cloud has a silver lining of unravelling woollen thread, so to make the most of my shrunken winter cardi, I decided to transform it into a mini cushion cover, with built in buttons!


To rectify the same sad situation if you happen to experience a washing machine disaster, or even if you fancy purposefully cooking an old piece of knitware in the machine, you will need:
  • a woollen cardigan or jumper
  • needle, pins and thread
  • a cushion (the size depends on the size of your shrunken item)

1. After your jumper/cardigan has been suitably resized in the washing machine in a 60 degree spin, trim off the sleeves, shoulders and neck in one go, until the body left is the correct size for your cushion.

2. Turn the item inside out and pin along the top and bottom edges, then sew along these sides, either by hand or with a sewing machine, and if you need too, sew along the two sides to ensure it fits the cushion snugly.


3. Turn the cover back round the right way, and voila, it is complete!

Monday, 24 October 2011

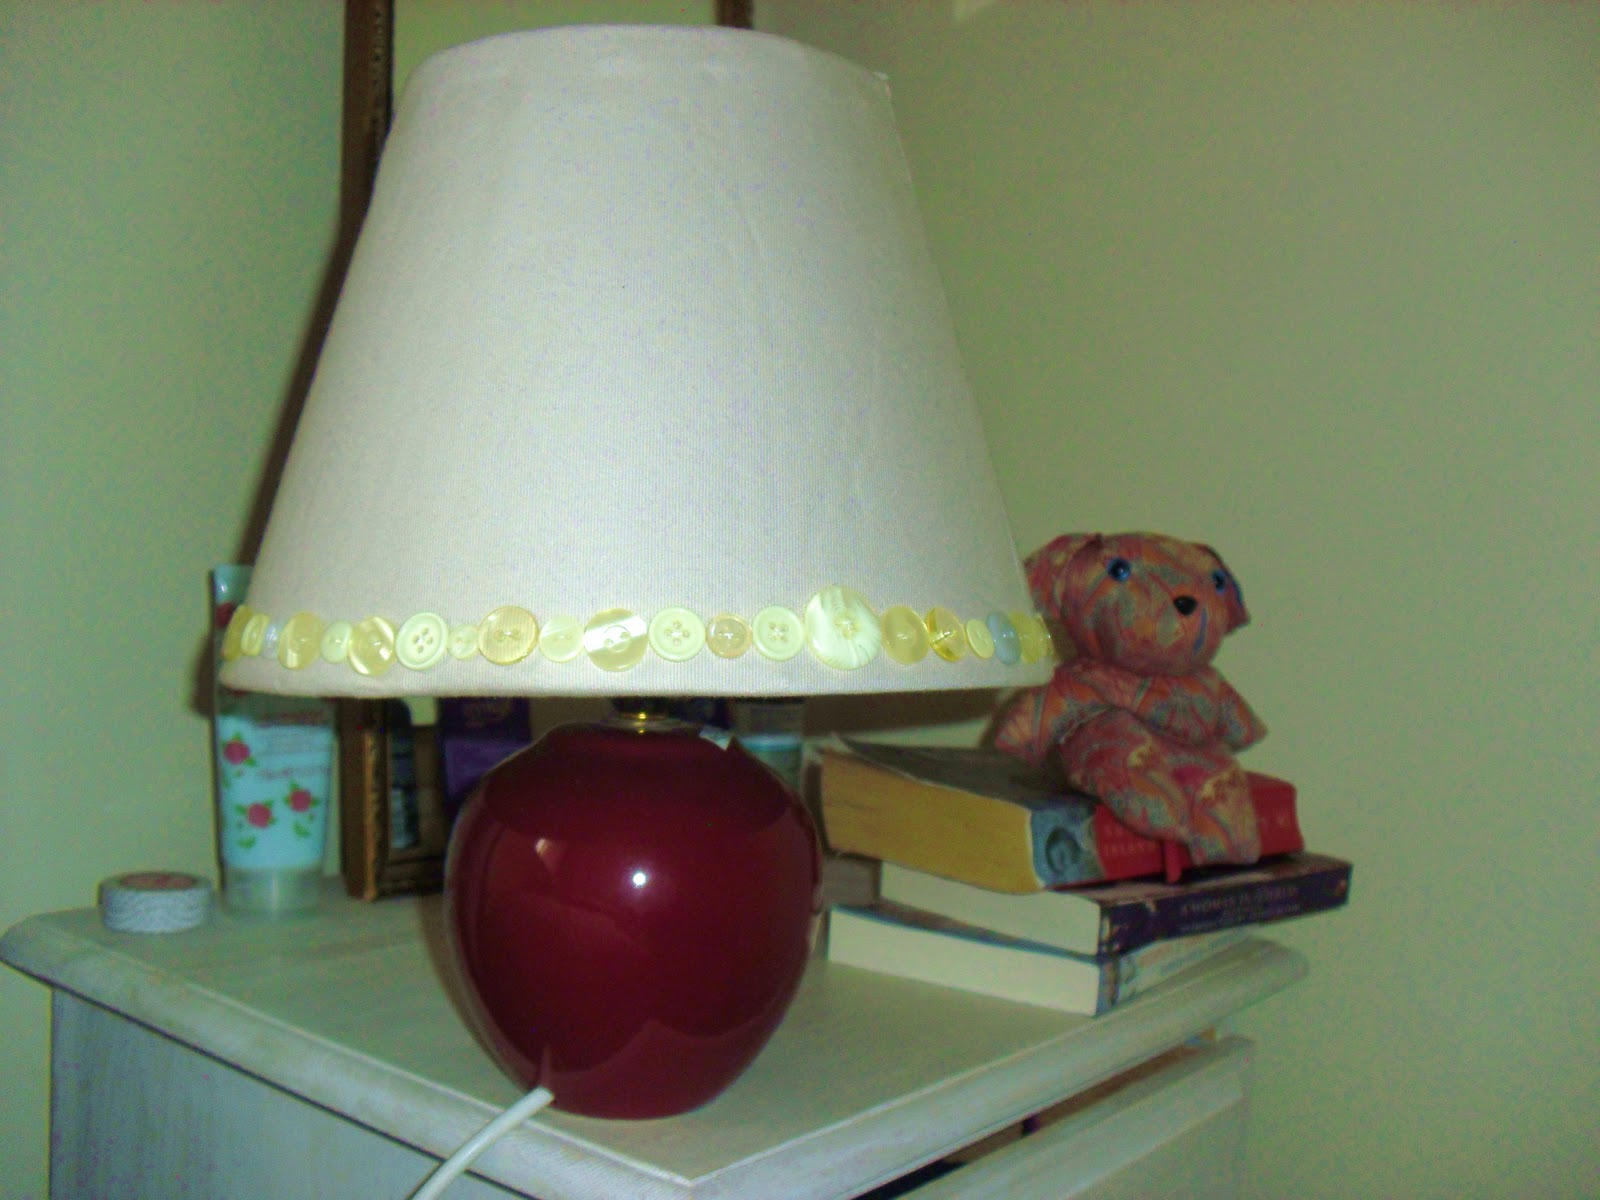
Button lampshade

I was given a plain, dark red lampshade on a dark red porcelain base by my aunt, which goes perfectly with the subtle red theme in the bedroom, on the bedside table. However, over the weekend I decided that the red needed slightly toning down/lightening up to blend with the other furniture and bits and bobs in the bedroom...


Materials:
  • old lampshade
  • fabric
  • buttons
  • pva glue
  • needle, thread and pins
  1. I cut a rectangular length of cream material that was left over from the bedroom curtains and pinned it over the red lampshade in order to see whereabouts the ends of the fabric would overlap. At this point I folded about 1/2 and inch of one edge of the material under itself and pinned it into a hem.
  2. I then glued the fabric lightly onto the lampshade and held it in place with pegs at the top and bottom while it dried. Then I overlapped the fabric round the top and bottom of the lampshade and used a sturdy needle to sew neatly round the top and bottom, and vertically down the seam where the fabric overlapped itself.
  3. It needed something to finish it off, so I collected lots of similarly coloured buttons from my button tins and sewed them along the bottom edge of the lampshade.

Monday, 29 August 2011

Appliqued greetings cards

Sending a homemade card always feels that bit more special than sending a shop-bought one. These cards can be personalised to suit anyone or any occasion, and take hardly any time to make!


All you need is:
Card
Fabric
Scissors
Paper to make a template from
Needle, pins and thread
Any buttons or extra decorations you want to sew on


  1. Firstly draw and cut out your design of choice onto a piece of paper. You could trace a picture printed off the internet, or draw round a cookie cutter. These bunny and bird cards are perfect for Easter cards or sending any time in Spring.
  2. Pin the template onto your chosen fabric and cut around it. Make sure you sew any buttons/details on (for eyes, wings etc) before you sew the main body onto the actual card.
  3. Fold your card in half and pin the fabric shape onto the front.

 
4. Using a basic running stitch, sew the shape onto the card all the way round the edge of the fabric.


And tada! A very simple yet lovely greetings card.

NB Write messages on the front of the card in pencil to look more subtle than pen :)

Monday, 1 August 2011

Making the most of jars...


I'm a bit of a hoarder when it comes to jars. Once they're empty and washed they make perfect storage for anything from nuts and seeds, to sugar, baking ingredients and cake decorations, and from ribbons to buttons and safety pins.


To liven up kitchen cupboards I like to add circular fabric covers to the lids of jars, which is super easy. All you need is some fabric cut into circles about 2cm bigger than the circumference of the jar lid by drawing round a template (I used a CD) and a small elastic band to secure the fabric onto the lid:


Another idea to spruce up some empty jars is to attach some buttons or beads threaded onto a piece of wire round the rim of the jar. Thread the buttons onto the wire evenly, leaving a little space between each so they lay flat, and fasten the wire securely:


These are perfect for storing robbons, more buttons, knick knacks, pens, paintbrushes - you name it! Alternatively, they can be used a dainty candle holders at a party, either resting on a table, or hooked up with wire, indoors or out, for a subtle, magical, flowery glow.....sorry, got a bit carried away with airy fairy descriptions there!
Enjoy!

Wednesday, 27 July 2011

Buttons and beads

I had a major reshuffle of my sewing box the other day as it was basically overflowing with all sorts of pins, beads, ribbons, thread, buttons and random bits of material . . . and as organised as I like to keep things, this did not please me.

Luckily, Jim's mum recently gave me a lovely old school Moet & Chandon tin, which was the perfect new home for my increasing ribbon collection. And then a visit to my Granny's this weekend just past was even more fruitful in the tin arena, in the form of these little tea leaf tins, which I happily filled with all my buttons and beads. Colourised of course. A great stress-relieving job!