Showing posts with label home. Show all posts

Friday, 24 October 2014

Quick and easy window blind

It doesn't seem an obvious time to make a window blind for the bedroom now that the days are getting shorter and the mornings and evenings darker. However, we have an annoyingly bright streetlamp right outside our bedroom window and very measly thin white curtains, so for a while now I have had one intention and one intention only - to block out the light as much as possible by making an easy window blind.

Before:


Granted, it is daylight coming through the curtains there, but it's not too dissimilar at night!

Having never attempted a blind before I Googled some techniques and came up with the following equipment needed:

  • 2 identically sized pieces of contrasting fabric 2-3 inches larger round each side of the window you are fitting the blind to
  • needle/sewing machine, thread, pins
  • 4 x strips of ribbon the length of the window
  • sticky velcro strips slightly longer than the width of the window
  • doweling (I used a bamboo stick from my Dad's garden) 

And this is the rough method:

1. Cut your fabric pieces to size (remembering to allow space for seams) and pin the patterned sides together (face to face).

2. Sew along the bottom and down each side of the materials and then turn the fabric the right way out before ironing all the edges flat.

3. Sew along the bottom edge of the blind (about 1-1 1/2 inches from the bottom) for the doweling to slot into later:
 

 4. Pin your 4 bits of ribbon to the front and back of the top (the un-sewn edge) of the blind, about 1/4 of the way in from each side:


5. Then pin your furry (not the scratchy) part of the velcro strip to the front of the blind...


...before folding the pinned velcro over and pinning the fold so the velcro strip is now on the back of the top of the blind:


6.  Using a strong needle sew the velcro and ribbons into place:


7. Unpick a few stitches on one end of the inch strip you sewed at the bottom of the blind and gently slide in the doweling:


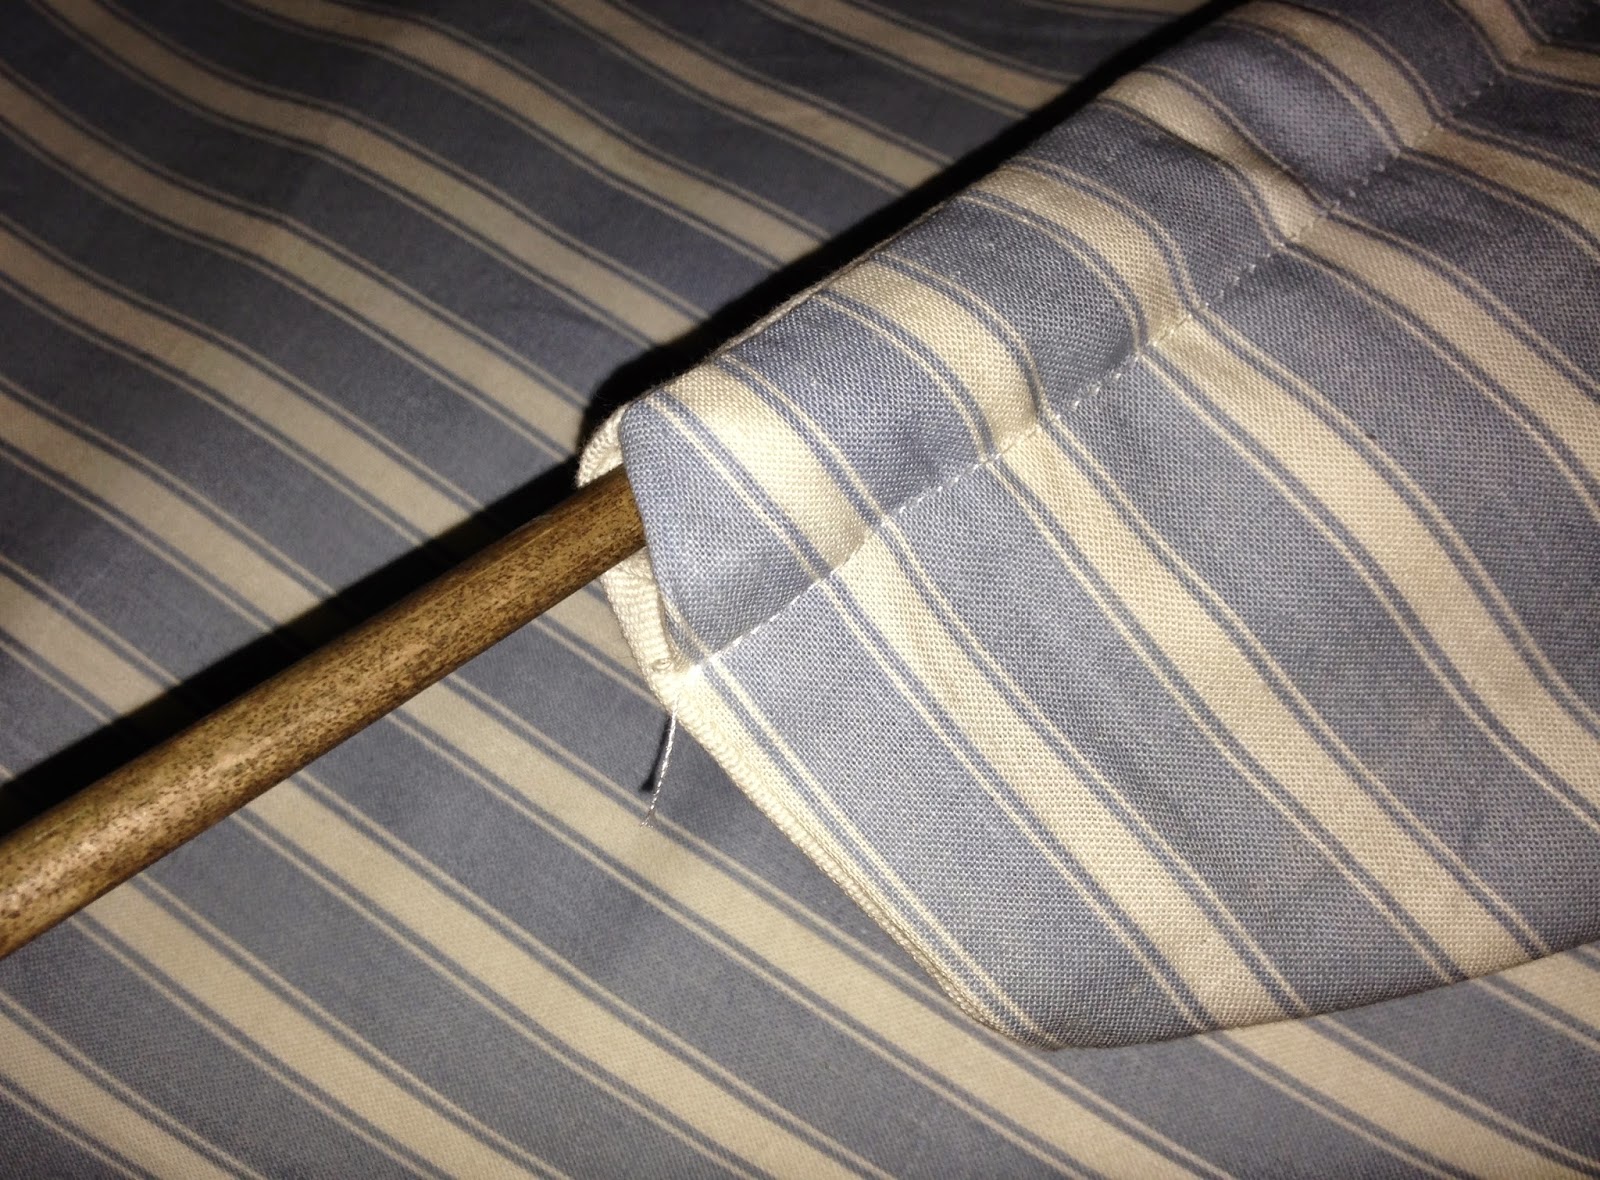
8. Unpeel the protective tape from the scratchy, sticky bit of velcro and stick it to the wall or frame where you want to hang the blind, then simply attach the blind with the furry side of the velcro:


Ta da! It's doing a great job as Jim has struggled to get up for work on two consecutive days in a row due to not being used to it being so dark in the bedroom in the mornings!


Friday, 8 August 2014

Rustic stamped wooden hangers

I recently found these hangers in a charity shop £1 for 6 so snapped up a dozen immediately!


I've always liked the idea of having a long row of hooks all the way across one wall with personalised hangers to hang things on, in a hallway or bedroom, as well as straightforward hooks:

 
The hangers were all in excellent condition, but to do anything with them I though it would be best to start off by giving them a light sand:


Then out came my trusty inkpad and alphabet stamp set, which I recenty bought from ebay and am now obsessed with:


I played around with some homely words and phrases that would fit nicely on the hanger arms and practised with the stamps (it's fairly fiddly)...


...and then I got stuck in:


I love that they look a bit scruffy and rustic - it gives them a bit more personality somehow! I'll need to varnish them at some stage so they last, and I should also work on the hooks that I plan to hang them on...!


Tuesday, 18 March 2014

Chest of Drawer Handles


This has been the sad front of the chest of drawers we rescued from freecycle nearly a couple of years ago, sanded down, and left handle-less after I successfully rusted all the orignal brass drawer pulls...eeek.


I had spotted the idea of using an old belt as handles so scouted some used leather belts on ebay for a couple of pounds each.

I cut them into identical lengthed strips and made holes where I wanted the nuts and bolts to go once the strips were positioned in a bent handle shape on the drawers: 


Using these industrial "machine screws" I attached the leather handles to the drawers through the original handle screw holes and tightened the nights on the inside of the drawers:


Handles at last!

Wednesday, 29 May 2013

Stenciled Cushion Cover


Unfortunately I can't take credit for this idea - I saw it on Pinterest and luckily had all the necessary tools and spare plain cushion cover ready to use!


These stencils are amazing. My sisters - Elly and Fizzy - and I had a whole multicoloured set that we used all the time when we were little, which included animals, numbers, modes of transport, shapes - you name it, we could stencil it!


I practised on a piece of scrap wrapping paper the same size as the cushion cover to work out how the quote I wanted to use would fit. Then I used a Sharpie permanent fabric marker to stencil the words onto the cover...


...and coloured in the letters.


And this was the result! I had to google "lilies" several times, as both my Dad and Jim pointed out that it was spelt wrong. It's not, it is L.I.L.I.E.S.


"When you have only two pennies left in the world buy a loaf of bread with one and a bunch of lilies with the other." Chinese proverb.


Thursday, 18 April 2013

Candle decorations

This is a simple little project that can be done while watching telly or even travelling on the bus. All you need is a selection of buttons and beads, some strong by easily malleable craft wire and a candle to jazz up. One thing to remember: Make sure your piece of wire(s) is twice as long as the circumference of the candle as it loses length when you thread the buttons on.

Et voila:


You can decorate anything in this way, from candles, jars,and vases to chair legs, and even human legs.


Wednesday, 6 March 2013

Spring has sprung fabric noticeboard


After yesterday's delightful weather (highs of 16 degrees C on 5th March!) I thought it was time to post this blog on how to make a fabric covered noticeboard, after I recently made this floral and blue-ribboned one for Jim's sister's 18th birthday. It would also make a great Mothers' Day present :)


Take one old/new/borrowed (I don't know if you can get blue ones) cork pinboard and some wadding, and cut the wadding so that it is 3 inches bigger than the board all the way round.


I laid the board face down on the wadding and folded the edges round onto the back of the board. I also removed the tiny hooks and pins and kept them safe to re-attach later on.


I cut all four corners off the rectangle of wadding, so that it would fold better and sit more neatly on the back of the board.


Initially I tried using a staple-gun to affix the wadding, but the staples fell out. My very good friend and craft advisor Stephanie Lewis recommended using double sided carpet tape to stick it on. Carpet tape is truly the stickiest and best "attatcher" I have ever come across.


I then cut the fabric I wanted to use to size, again, about 3 inches larger all round than the board. Next I placed the wadding-covered board face down on the underside of the fabric and used the corner-cutting and carpet tape method as above to attach the fabic, making sure it was pulled quite tight.


Next I cut the ribbon to the different lengths required in order to make a nice diagonal criss-criss pattern and pinned them in place. I used a glue gun to stick down each ribbon end to the reverse of the board, again, ensuring that the ribbons were quite taught.


With the back of the board looking a bit scruffy what with the layers of wadding, carpet tape, fabric, ribbon and glue, I took an extra large bit of cardboard, trimmed it down to size and glue-gunned it onto the back to hide the mess.


Using a hammer I gently re-attached the hooks to the back of the board, ensuring the pattern on the fabric would be hanging the right way up.


Last but not least, I sewed some pearly buttons onto each ribbon crossover, also sewing through the fabric to make the ribbons a bit sturdier to hang things on.


This is an example of another board that my beautfiul mum made me a few years ago.


It's where I keep all the pretty cards and notelets that come through the post :)


Wednesday, 31 October 2012

Paris Grey painted chairs

Over the past few months I have been building up quite a collection of dining chairs. As useful as they are for sitting on, standing on, storing and displaying things on, and generally making the place feel more homely, there are only so many that we can fit into our tiny flat. I have now conlcuded that this number is five. We have two lovely spindly ones from my mum and dad, an even spindlier one that used to belong to Jim's Grandma, and an extra, younger, chunkier one we picked up from a charity shop when the need to seat 4 people became absolutely desperate.

The latest acquisitions came from the one and only freecycle.org and were a lovely sturdy pair of wooden dining chairs:


They were painted lovely colours, but had seen better days. I wanted to make our mismatched dining chair collection feel slightly more uniform and part of the same family, so looked into painting them, or at least a few of them the same colour. I began by giving these two a good wash down in the front garden and waited for them to dry while sitting in the last bit of autumn sunshine back in September.

That morning I had dragged Jim to The Forest Bailif a beautiful interior decoration and furniture shop in Raynes Park, where I picked up a sample pot of Annie Sloane's chalk paint in Paris Grey. This composition of paint is absolutely amazing. It has a rugged appearance but soft texture to it and you don't need to sand down or prime the item you are painting before applying the chalk paint. A brilliant time saver for impatient people like me!


Having confirmed that I loved the Paris Grey - this was a mighty achievement as I am so indecisive, but loved the colour for it's name (a sentimental reminder of our trip to Paris earlier this year) and also because it goes with everything in our living/dining room - I dragged Jim to a second Annie Sloane stockist - Tomlinsons in lovely Dulwich Village, where I splashed out on a whole litre pot of the Paris Grey chalk paint and some protective clear wax.

And this was the final result, after two coats of the paint and one of the wax:


Next on the list - two more Paris Grey chairs, and possibly a purple one thrown into the mix??!