Showing posts with label gifts. Show all posts

Thursday, 18 April 2013

Candle decorations

This is a simple little project that can be done while watching telly or even travelling on the bus. All you need is a selection of buttons and beads, some strong by easily malleable craft wire and a candle to jazz up. One thing to remember: Make sure your piece of wire(s) is twice as long as the circumference of the candle as it loses length when you thread the buttons on.

Et voila:


You can decorate anything in this way, from candles, jars,and vases to chair legs, and even human legs.


Wednesday, 6 March 2013

Spring has sprung fabric noticeboard


After yesterday's delightful weather (highs of 16 degrees C on 5th March!) I thought it was time to post this blog on how to make a fabric covered noticeboard, after I recently made this floral and blue-ribboned one for Jim's sister's 18th birthday. It would also make a great Mothers' Day present :)


Take one old/new/borrowed (I don't know if you can get blue ones) cork pinboard and some wadding, and cut the wadding so that it is 3 inches bigger than the board all the way round.


I laid the board face down on the wadding and folded the edges round onto the back of the board. I also removed the tiny hooks and pins and kept them safe to re-attach later on.


I cut all four corners off the rectangle of wadding, so that it would fold better and sit more neatly on the back of the board.


Initially I tried using a staple-gun to affix the wadding, but the staples fell out. My very good friend and craft advisor Stephanie Lewis recommended using double sided carpet tape to stick it on. Carpet tape is truly the stickiest and best "attatcher" I have ever come across.


I then cut the fabric I wanted to use to size, again, about 3 inches larger all round than the board. Next I placed the wadding-covered board face down on the underside of the fabric and used the corner-cutting and carpet tape method as above to attach the fabic, making sure it was pulled quite tight.


Next I cut the ribbon to the different lengths required in order to make a nice diagonal criss-criss pattern and pinned them in place. I used a glue gun to stick down each ribbon end to the reverse of the board, again, ensuring that the ribbons were quite taught.


With the back of the board looking a bit scruffy what with the layers of wadding, carpet tape, fabric, ribbon and glue, I took an extra large bit of cardboard, trimmed it down to size and glue-gunned it onto the back to hide the mess.


Using a hammer I gently re-attached the hooks to the back of the board, ensuring the pattern on the fabric would be hanging the right way up.


Last but not least, I sewed some pearly buttons onto each ribbon crossover, also sewing through the fabric to make the ribbons a bit sturdier to hang things on.


This is an example of another board that my beautfiul mum made me a few years ago.


It's where I keep all the pretty cards and notelets that come through the post :)


Thursday, 7 February 2013

Valentine's Heart Decoration


This is a bit of a cheaty post as I originally made this hanging heart decoration to give to my lovely friend Sally as a Secret Santa Christmas present back in December. However, this time of year sees the rekindling of all heart-shaped things in celebration of Valentine's Day.


Ahh lovely.

So, if you are in need of some inspiration for a simple and effective Valentine's gift that won't break the bank, or just fancy sewing a delightful little decoration regardless of the time of year, then follow the simple steps below!


1. Cut a heart shape out of old newspaper to the size you want. I wouldn't go much smaller than 10cm in height otherwise it might bet a bit fiddly sewing on the letters, but would be absolutely fine if you wanted to leave the hearts plain.


2. Use the heart template to cut out hearts (double the number of finished hearts that you so desire) from your chosen fabric and keep them together in pairs.


3. Using a contracting fabric, or many contrasting fabrics, cut out the letters of the word you want to spell out on your hearts. I used letters printed out from the computer so all my letters were the same font and size.

4. Using blanket stitch, I sewed each letter onto one fabric heart.

5. Now pin one lettered heart to one plain heart and use a basic running stitch to sew all the way around, about 1cm in from the edge. But don't sew right the way round to where you started - you need to leave a gap about 2 inches long to stick the stuffing into to make the hearts 3D. Once they are as fat as you like with stuffing finish off sewing round the heart.

6. Cut a length of ribbon about 15cm long for each heart. Fold the bits of ribbon in half and pin them to the top of the heart inside the two bits of fabric. Attach the pieces of ribbon with a single sturdy cross-stitch running through the ribbon and both bits of fabric.


7. Now thread a piece of string or more ribbon through the ribbon loops you have sewn onto the hearts and voila! A hanging heart decoration to add a bit of country loving to your home, or to give as a Valentine's Day present.


Friday, 3 February 2012

Early bird Valentine's jewelled cinnamon biscuits


Valentine's Day is a funny old celebration. It seems to come at just the right length of time after Christmas, so that if you're in a relationship you have enough time to think about and save up for a little present for your other half, or if you aren't, it's a great excuse to get together with friends and share a bottle of wine after Christmas and New Year and the January "detox".

My relationship with Jim has been the longest I've ever been in, which is fab, but something that has slightly distressed me over the past couple of years, is that we seem to have reached a stage where every year we have the old "Let's not do Valentine's Day presents this year" chat. I spoke to a friend last night who said she and her boyfriend had the same chat pre-Christmas. Of course, all ladies know that despite what is actually being said, it does not mean NO presents. So on Christmas Day she gave him a nice leather wallet, but sadly he took what had been discussed as gospel and she ended up with nothing. Take note boys, in no way does "not doing presents" really mean NO presents, it simply means something moderate, as opposed to a trip to Paris/ten thousand red roses/a Pandora necklace. No one should be completely presentless at Valentine's Day and definitely not at Christmas.

So, bearing this in mind, I set about thinking about a present that I could give Jim, which would be moderate - low-cost, but high-impact. Jim is a sucker for biscuits. He uses making a cup of tea as an excuse to then dip into it and eat as many biscuits as he can. So this was a good starting point - biscuits.

I remember my Mum baking some particularly fun biscuits with my sisters and me years and years ago, where the general method was to make a simple biscuit dough, cut out the cookies, smash up loads of boiled sweets with a rolling pin......sounds bizarre doesn't it. Well, I have refined this method and the ingredients list (see below), and added a dash of cinnamon to make the biscuits a bit more grown up and perfect for a subtle yet well-received Valentine's treat....


Jewelled cinnamon biscuits
Ingredients:
150g butter or margerine
200g caster sugar
300g plain flour (and a bit for rolling out the dough)
1 egg
1 tsp cinnamon
a few drops of vanilla essence/extract
a pinch of salt
and one pack of boiled sweets

Method:
  1. Preheat the oven to 175C (350 farenheit/gas mark 4) and line your baking trays with greaseproof paper.
  2. Beat the sugar, butter and vanila together with an electric mixer until light and fluffy, then add the egg, and beat until it is all incorporated.
  3. Stir in the flour and salt with a wooden spooen until the mixture starts to stick together in a soft dough.
  4. Roll out the dough on a floured surface, with a floured rolling pin, to about 5mm thick.

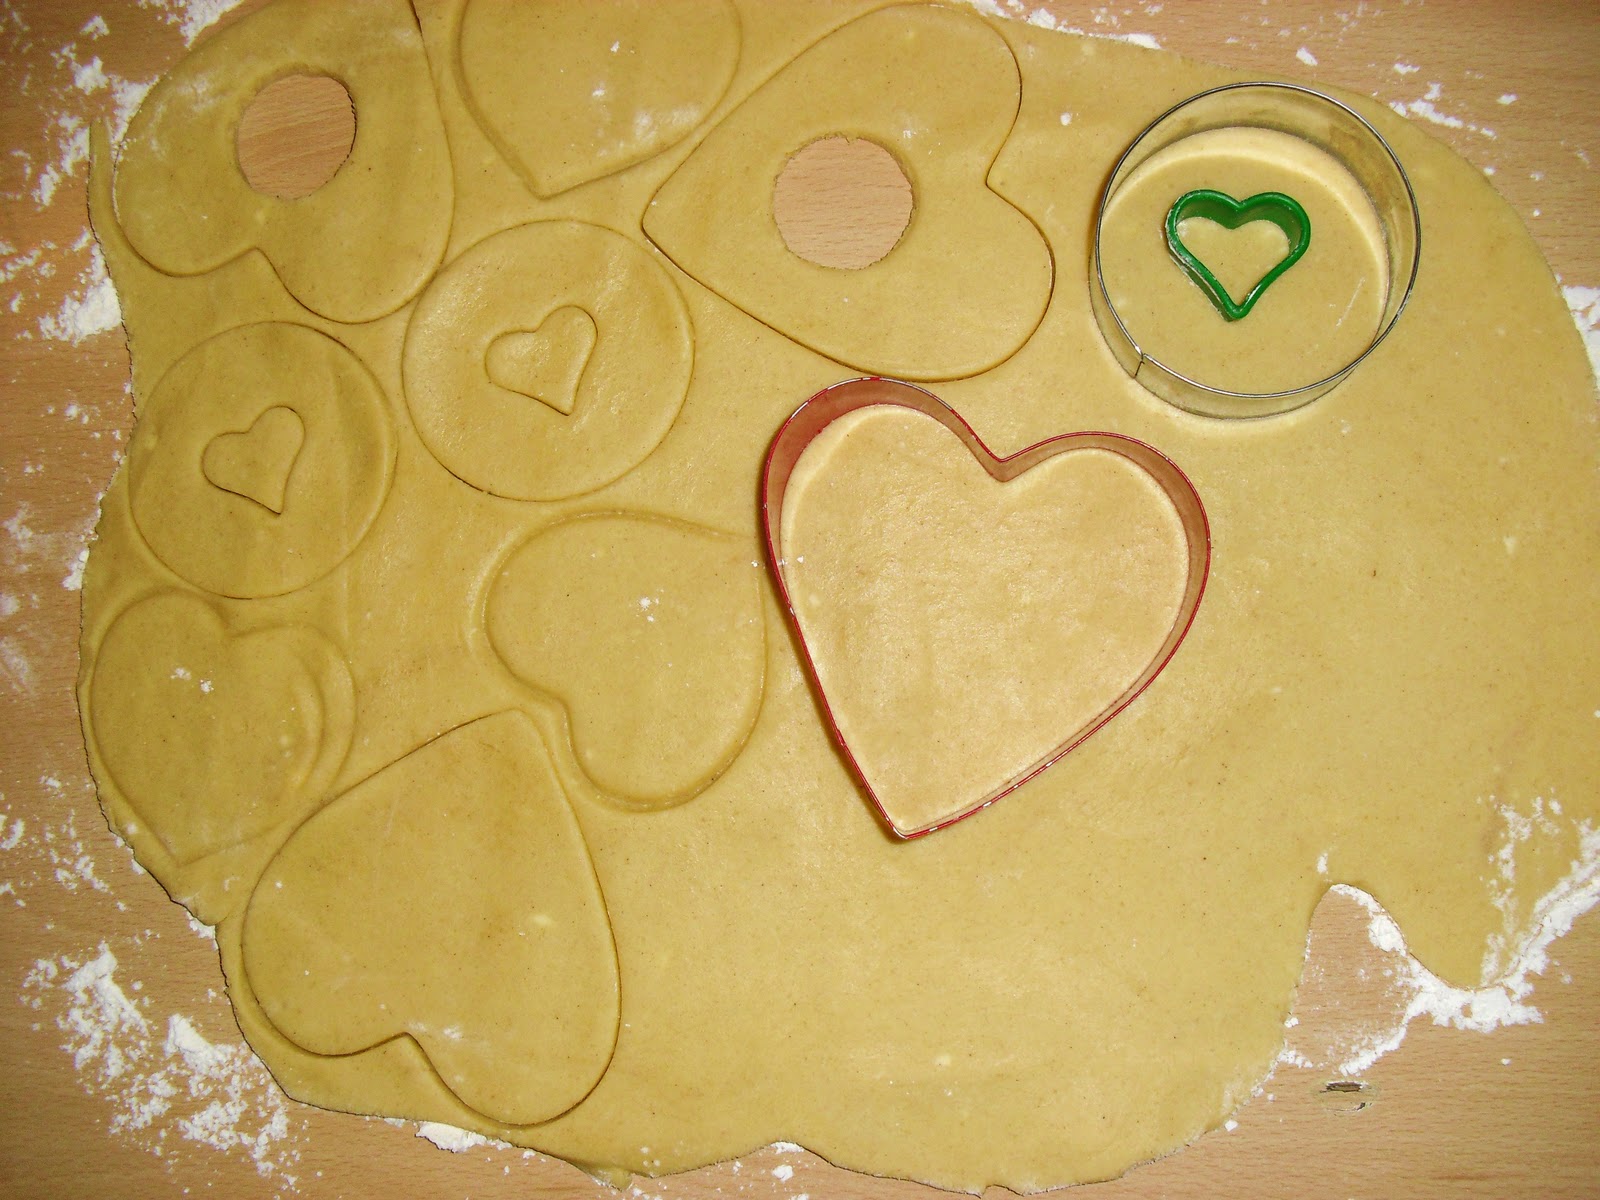
5. Using a selection of cookie cutters, cut out large shapes and then cut out smaller shapes inside, and transfer to your baking trays.


6. Place a boiled sweet in a sandwich/freezer bag and bash until crumbled with your rolling pin. Sprinkle the crushed sweet in the gaps in the biscuits.

7. Bake your biscuits for 8-9 minutes or until they start to go a very light brown. Remove from the oven and leave to cool before removing them from the greaseproof paper.


8. Serve them to your boyfriend/girlfriend in a tin or on a plate with a nice cup of tea!


Wednesday, 21 December 2011

Christmas gingerbread

This is a wonderfully easy and tasty recipe that makes the kitchen smell amazing while the gingerbread is cooking, and looks lovely once decorated, and possibly strung up in garlands around the house. They last well too, so can be packaged or boxed up and given to people as presents or when you have visitors over the Christmas period, and they'll continue to taste good!


To make 16-20 medium to large gingerbread biscuits you will need the following ingredients:
  • 350g plain flour
  • 75g caster sugar
  • 75g dark soft brown sugar
  • 100g unsalted butter
  • 1 egg
  • 3 tbsp golden syrup
  • 1 tsp bicarbonate soda
  • 2 tsps ground ginger
  • 1 tsp ground cinnamon
  • a tiny pinch of salt
  • Icing sugar, water, food colouring and sprinkles etc (if you fancy) for the biscuit decoration
Method:
  1. Set the oven to 180 degrees C (350 F/gas mark 4) and simply mix all the dry ingredients together in a large bowl while making sure there are no lumps of dark brown sugar left in the mix.
  2. Make a well in the middle and mix in all the remaining ingredients (a bit of olive oil on the measuring spoon stops the golden syrup from sticking), then using your hands form the mixture into a ball of dough.
  3. Roll out the dough on a floured surface, with a floured rolling pin, until it's about 5mm thick.
  4. Cut out your biscuits and remember to make holes in the top before they go into the oven if you are planning on hanging the biscuits up as decorations. Place on greased and lined baking trays and cook for 9-10 minutes, checking regularly until they are light golden brown.
  5. Let the biscuits cool on the baking trays before turning them onto a wire cooling rack. Check to make sure the holes haven't closed up.
  6. When they are completely cool, follow instuctions on the side of your icing sugar box to make icing and pipe onto the biscuits into Christmassy designs!

I went for "Merry Christmas" written on the gingerbread biscuits and strung up on string as a garland.


Alternatively, you can attach string or ribbon to individual biscuits and give them as smaller gifts for friends and family:


Have a SSSSSSSSSSuper Christmas!!

Thursday, 28 July 2011

Fabric covered birthday card book


This is a handy little project for making a diary to keep a record of important people's birthdays, combined with a storage place for bithday cards, to help avoid that last minute dash to Paperchase when you realise you've missed your granny's birthday . . .

I came up with the idea when I noticed my mum's diary was bulging with an excessive amount of pre-bought birthday cards, slotted in between the pages of the month it was destined to be sent (you can tell where I get my uber-organisational skills from). However, not only was this entirely impractical for when she needed to take her diary out and about (along came a huge stash of cellophane-wrapped greetings cards) there was also a fairly regular disastrous occurence when the diary and it's entire contents scattered all over the floor after being knocked off the table.

For the birthday card book
You will need:
  1.  Begin by sewing strips of fabric into two horizontal patchworks about an inch longer than the width and length of the book, to cover the front and back covers. Alternatively, if you are short of time, just measure and cut two pieces of fabric so they are slightly larger than the front and back covers. Set these aside.
  2. As the book will be divided up by month, work out how many pages you'd like to use for the monthly calendar (I used one side of one page) and then add on two extra for each month - these will make the actual holder for the cards - "card" pages. It's OK to rip out excess pages as having the cards in the book will take up lots of space anyway.
  3. Use a pencil/pen and ruler to mark on a daily calendar for each month (remembering to leave two blank pages between each month).
4. Using a ruler, pencil and scissors, cut half of each first blank "card" page for each month diagonally from about two inches from the botton right corner to halfway up the left side. Discard the top of each of these.

5. Cut 12 strips of ribbon (one for each month) the same length as the width of the book's pages, and glue them to fasten the bottom of the diagonal "half" page and the full "card" page for each month together. Add a little bit on the bottom right hand side as well if you like. Use your paperclips or pegs to hold the ribbon in place until it sets.


6. When everything is dry you should have quite a sturdy little book. Take your fabric - plain or patchwork - and glue each bit to the front and back covers, making sure there is a little overlap glued down on the inside top and bottom.


7. Trim any excess material down the sides of the covers and to give it a more finished look take a final piece of ribbon and glue it to the edge (inside and out of the cover) to hide the edge of the material. Peg everything in place until dry.

 Here is the one I made my mum for her last birthday, in full use!

Sunday, 24 July 2011

Vintage cake stands

I absolutely love scouring old antique shops and charity shops for crockery gems. You can often pick up a selection of beautiful cups, plates and saucers at less than £1 a piece. Although it's not Jim's cup of tea, he doesn't mind eating the cakes and tasty treats off them once they've been transformed into handy little cake stands - ideal for parties and picnics.

To make a cakestand
You will need:
  • Old crockery - tea cups, small bowls, saucers and plates ov varying sizes
  • Super glue or a glue gun
     

    1. Play around with the colours, shapes and sizes of the selection of crockery you've acquired until you come up with a design you like. 


    2. Place the largest plate at the bottom, glue one cup/small bowl upside down to the centre of the plate and place a heavy item on the book until the glue sets.


    3. Next, glue a smaller plate the right way up to the base of the cup and wait again until it sets.

    4. Keep going until you have 2, 3, or even 4 layers...


    And finally...

    ...Tada!
    The finished article in use at a summer picnic!