Friday, 24 October 2014

Quick and easy window blind

It doesn't seem an obvious time to make a window blind for the bedroom now that the days are getting shorter and the mornings and evenings darker. However, we have an annoyingly bright streetlamp right outside our bedroom window and very measly thin white curtains, so for a while now I have had one intention and one intention only - to block out the light as much as possible by making an easy window blind.

Before:


Granted, it is daylight coming through the curtains there, but it's not too dissimilar at night!

Having never attempted a blind before I Googled some techniques and came up with the following equipment needed:

  • 2 identically sized pieces of contrasting fabric 2-3 inches larger round each side of the window you are fitting the blind to
  • needle/sewing machine, thread, pins
  • 4 x strips of ribbon the length of the window
  • sticky velcro strips slightly longer than the width of the window
  • doweling (I used a bamboo stick from my Dad's garden) 

And this is the rough method:

1. Cut your fabric pieces to size (remembering to allow space for seams) and pin the patterned sides together (face to face).

2. Sew along the bottom and down each side of the materials and then turn the fabric the right way out before ironing all the edges flat.

3. Sew along the bottom edge of the blind (about 1-1 1/2 inches from the bottom) for the doweling to slot into later:
 

 4. Pin your 4 bits of ribbon to the front and back of the top (the un-sewn edge) of the blind, about 1/4 of the way in from each side:


5. Then pin your furry (not the scratchy) part of the velcro strip to the front of the blind...


...before folding the pinned velcro over and pinning the fold so the velcro strip is now on the back of the top of the blind:


6.  Using a strong needle sew the velcro and ribbons into place:


7. Unpick a few stitches on one end of the inch strip you sewed at the bottom of the blind and gently slide in the doweling:
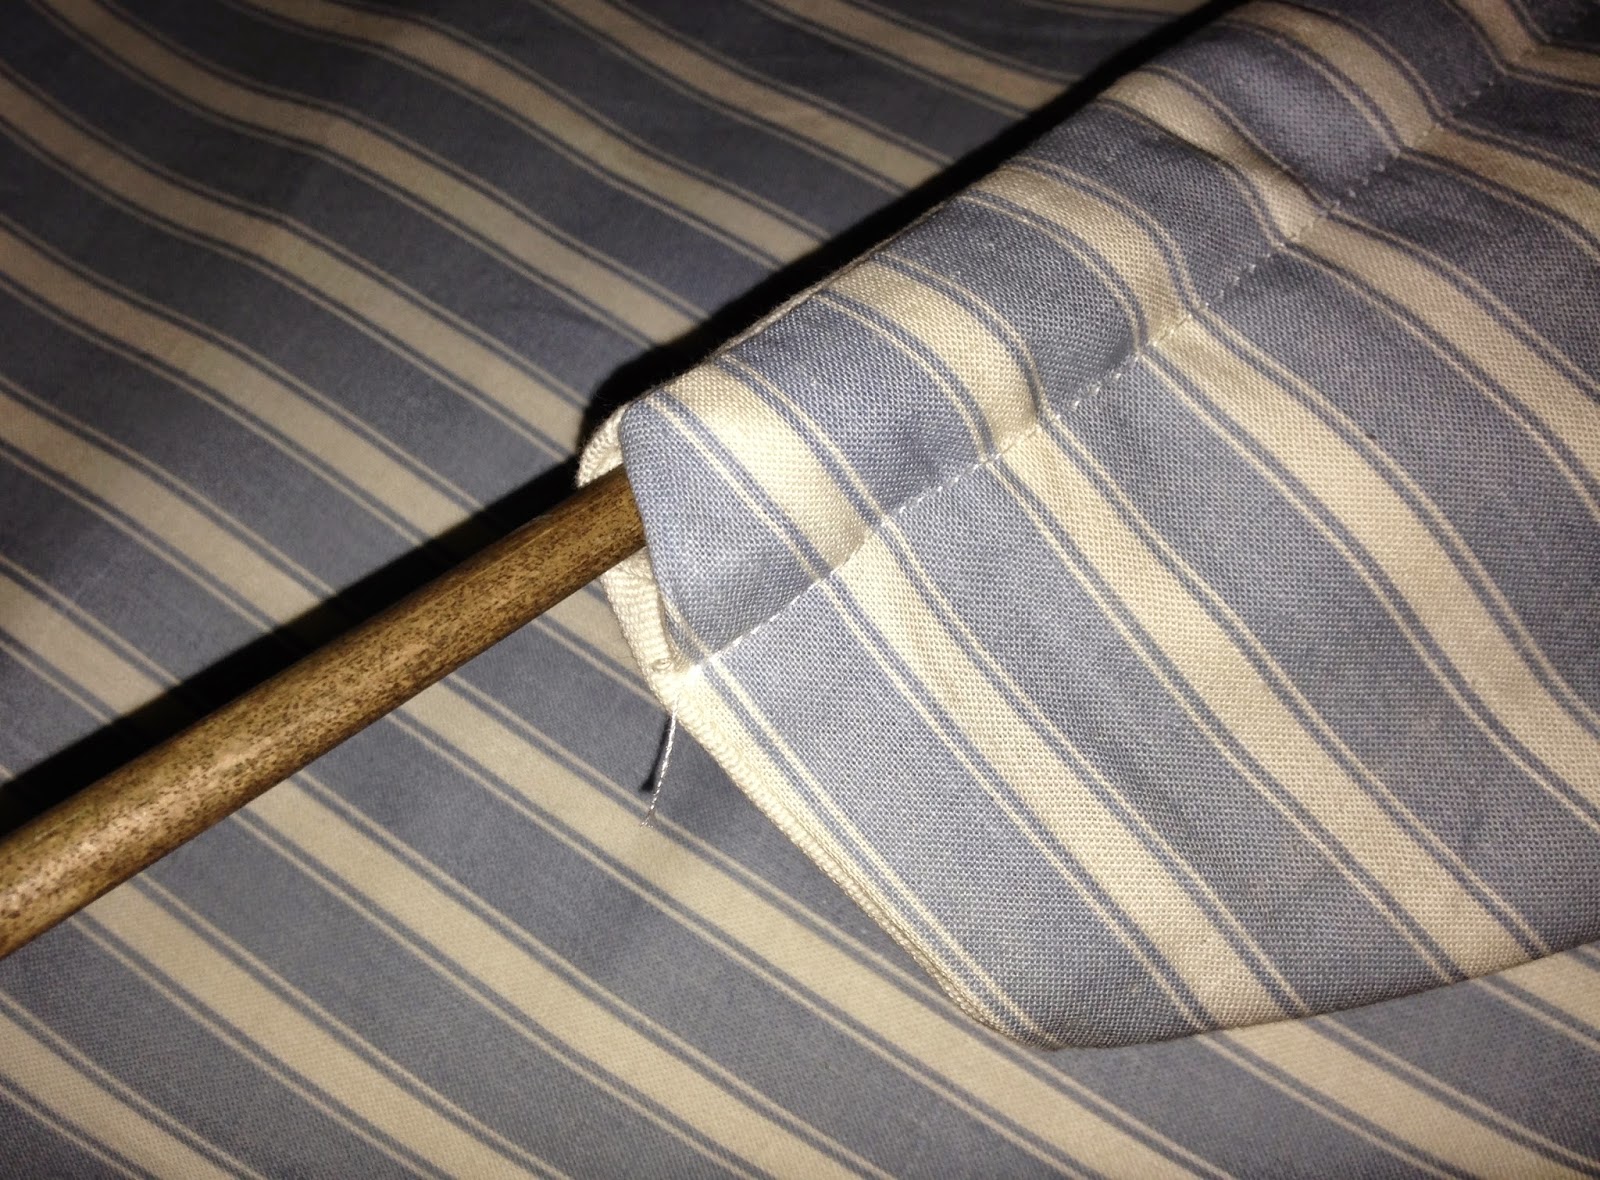
 

8. Unpeel the protective tape from the scratchy, sticky bit of velcro and stick it to the wall or frame where you want to hang the blind, then simply attach the blind with the furry side of the velcro:


Ta da! It's doing a great job as Jim has struggled to get up for work on two consecutive days in a row due to not being used to it being so dark in the bedroom in the mornings!


Tuesday, 30 September 2014

Ikea kitchen stool transformation


This basic stool from Ikea has clearly seen better days, so I thought it was time for a little re-vamping. I lightly sanded it before painting with primer:


...and then adding two coats of Farrow and Ball's Ball Green, letting each coat dry in between:


Charlie likes it!


Friday, 8 August 2014

Rustic stamped wooden hangers

I recently found these hangers in a charity shop £1 for 6 so snapped up a dozen immediately!


I've always liked the idea of having a long row of hooks all the way across one wall with personalised hangers to hang things on, in a hallway or bedroom, as well as straightforward hooks:

 
The hangers were all in excellent condition, but to do anything with them I though it would be best to start off by giving them a light sand:


Then out came my trusty inkpad and alphabet stamp set, which I recenty bought from ebay and am now obsessed with:


I played around with some homely words and phrases that would fit nicely on the hanger arms and practised with the stamps (it's fairly fiddly)...


...and then I got stuck in:


I love that they look a bit scruffy and rustic - it gives them a bit more personality somehow! I'll need to varnish them at some stage so they last, and I should also work on the hooks that I plan to hang them on...!


Wednesday, 30 July 2014

Customised sunglasses


Hello!

It's been a while. I can't believe the amazing summer we've been having in London so far - I hope it lasts!


On a summery note, I absolutely love these Tommy Hilfiger retro pastel sunglasses, they epitomise summer for me - such light, fun, care-free colours (similar to a Fab ice lolly) while of course, being super practical!

I have loads of pairs of sunglasses at home - some nice, some fake designer, some free with magazines - so I couldn't really justify buying another pair. Instead I set about transforming a plain black pair with the simple and wonderful thing that is nail varnish.


I created a guide for a straight line by covering up the bits I didn't want to paint with sellotape:


...and the attacked the top half of the glasses with a light icey blue nail varnish:


Once that was dry, I painted the inside of the frame with a contrasting bright coraly orange:


Et voila, as easy as painting your nails!


Tuesday, 18 March 2014

Chest of Drawer Handles


This has been the sad front of the chest of drawers we rescued from freecycle nearly a couple of years ago, sanded down, and left handle-less after I successfully rusted all the orignal brass drawer pulls...eeek.


I had spotted the idea of using an old belt as handles so scouted some used leather belts on ebay for a couple of pounds each.

I cut them into identical lengthed strips and made holes where I wanted the nuts and bolts to go once the strips were positioned in a bent handle shape on the drawers: 


Using these industrial "machine screws" I attached the leather handles to the drawers through the original handle screw holes and tightened the nights on the inside of the drawers:


Handles at last!